Telecommunications Best Practices
Radio Installation in a PWC - D9 Style
Contributed by Don Pryjmak DSO-OP D9CR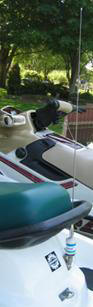 Here are some photos and instructions for the installation of a regular radio in a PWC, thereby increasing the communication range while on patrol. There are three components that make up a successful installation. They are a waterproof and submersible radio, water proof and submersible control microphone with integral speaker and controls, and antenna with a detachable whip. I will not specify any brand names at this point, but you can deduce from the pictures what brand was used.
First, mount the antenna at the stern portion of the PWC. Attach with screws, the loading coil bracket (sold separately or part of the loading coil) at the rear of the PWC. 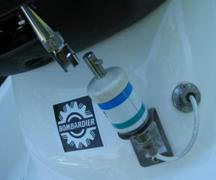 Pass the coaxial cable through the waterproof pass-through fitting and route to the front of the PWC, or wherever you will mount the main radio. A PL259 connector at the end of cable will attach the cable to the antenna base.
Note in the picture the detachable whip. You may remove the whip when you are using the PWC for non patrol activities. The whip is spring loaded and one quarter turn with downward pressure attaches or removes the whip from the loading coil.
Second,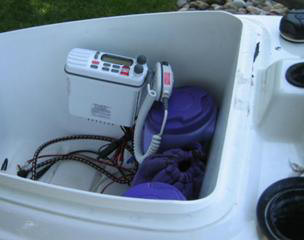 you will want to mount the radio in a waterproof or semi dry spot. I chose the forward bin of the PWC, since it is protected there. Remember to buy a radio which is Waterproof/Submersible to IPX7 or IPX8 standards. X7 is for up to 30 minute immersion in 1 meter of water, x8 is for continuous immersion in 1 meter of water. The radio should also have the capability to attach a separate control mike. Some manufacturers now offer a wireless remote mike, but you may want to have the one attached with the coiled mike cord to the PWC, to prevent expensive losses. Route the Coax as well as a ground and power lead from the battery to the front of the PWC.
You can use grommets or silicon sealant to prevent water entry into the storage compartment. Don’t forget to fuse the power lead, and leave plenty of slack outside the bin for ease of bin removal as required.
The third part of the installation is to choose a convenient mount for the remote access mike. I chose the door of the front compartment, since that part can be procured at a low cost when I sell the PWC. You will have to fish the mike control cable through some holes that you drill in the cover and route it to the radio in the front bin.
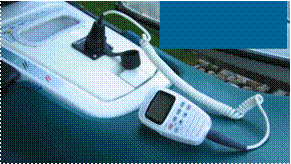 The finished installation looks like this. You can control all of the radio functions from the key pad on the mike. When you are not patrolling, then you detach all of the connections from the back of the radio, remove the radio, and unscrew the knurled knob which attaches the remote mike to the PWC. The rubber grommet covers the connector, and you can now use the PWC for recreation.
When riding the PWC, you can attach, with Velcro, the mike to your PFD so that you can hear the communications coming through the speaker inside the mike. The Velcro should release if you were to take a header off the PWC, or need to do a quick dismount.
There are many options that you may encounter for future applications as technology changes and new gadgets become available.
Radio Installation in a PWC - Juneau Style
Contributed by COMO Mike Folkerts D17Sta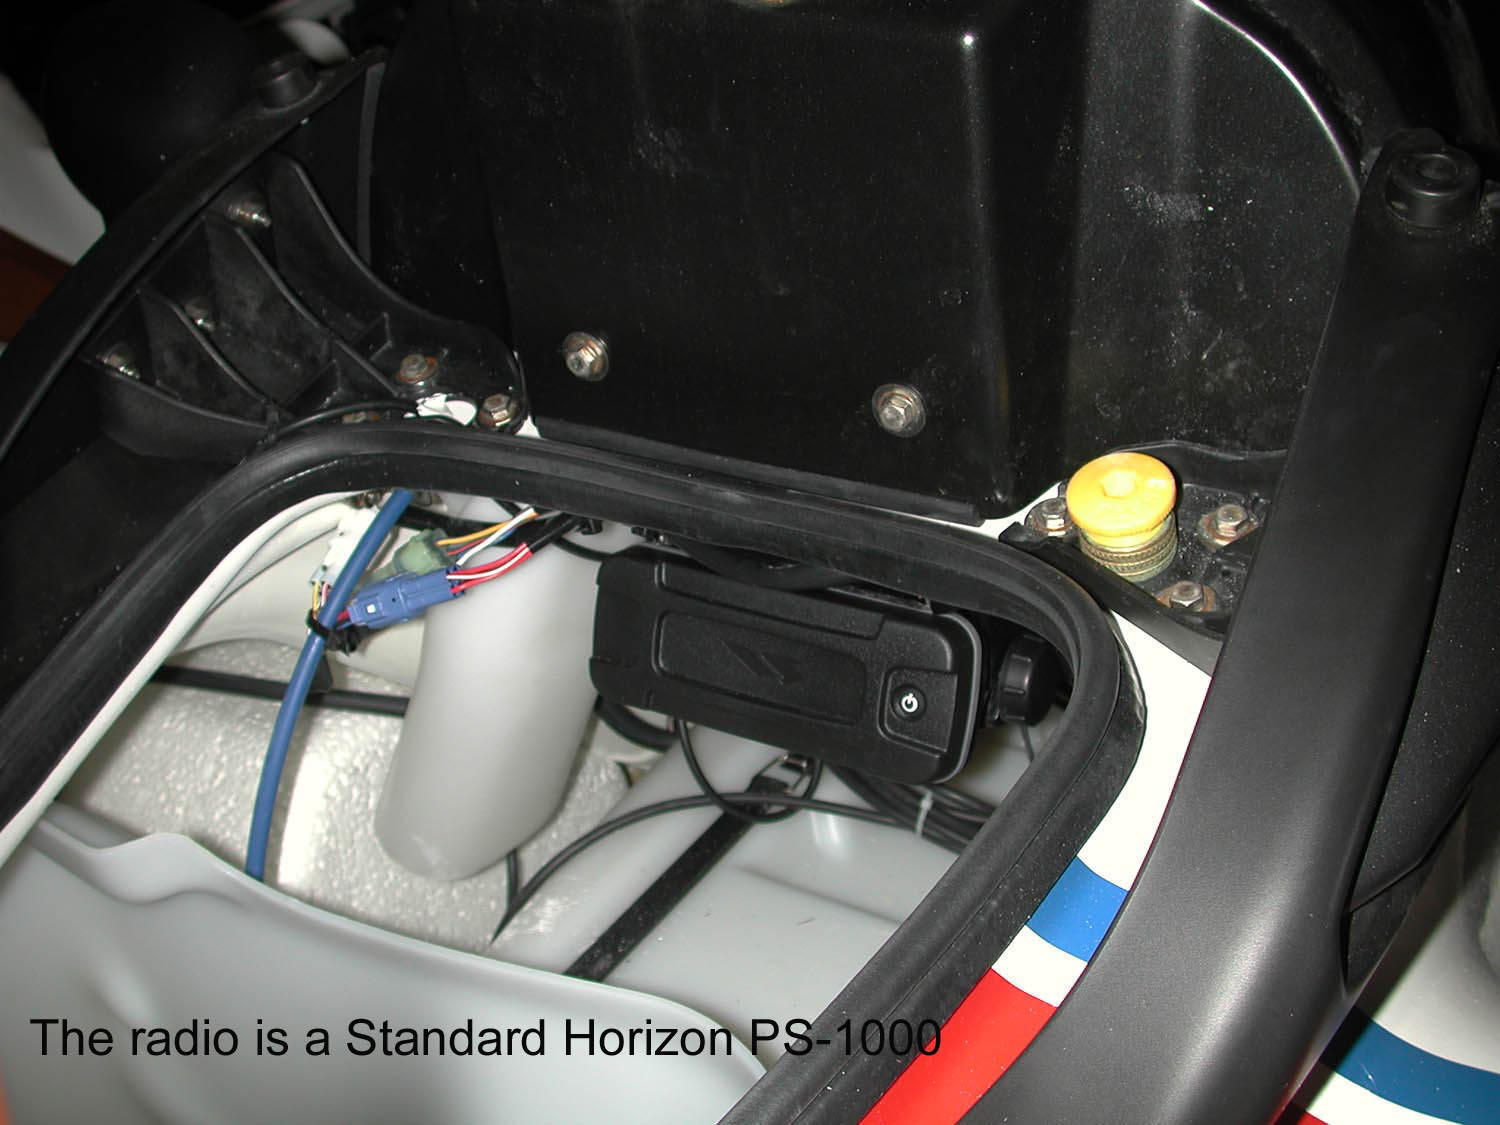 ndard Horizon PS-1000 seems best to meet the need given the limited mounting space available on the boats. It's out of the way in the front storage bin but fully accessible I fabricated a stainless bracket to mount the radio from and bolted it to the same bolts that hold the heavy plate that is under the black fiberglass cover and avoided drilling extra holes. I wired it through the battery switch so the radio will stay on when the machine is shut off and the radio will shut off when the battery switch is turned to off.
We mounted the antenna on the front so it does not interfere with operations on and off the boat. Opposite the fuel filler cap seemed the logical choice. The antenna is designed for center console boats and is PWC with front mounted Antena heavier than the standard three foot whips. The mount is a Lift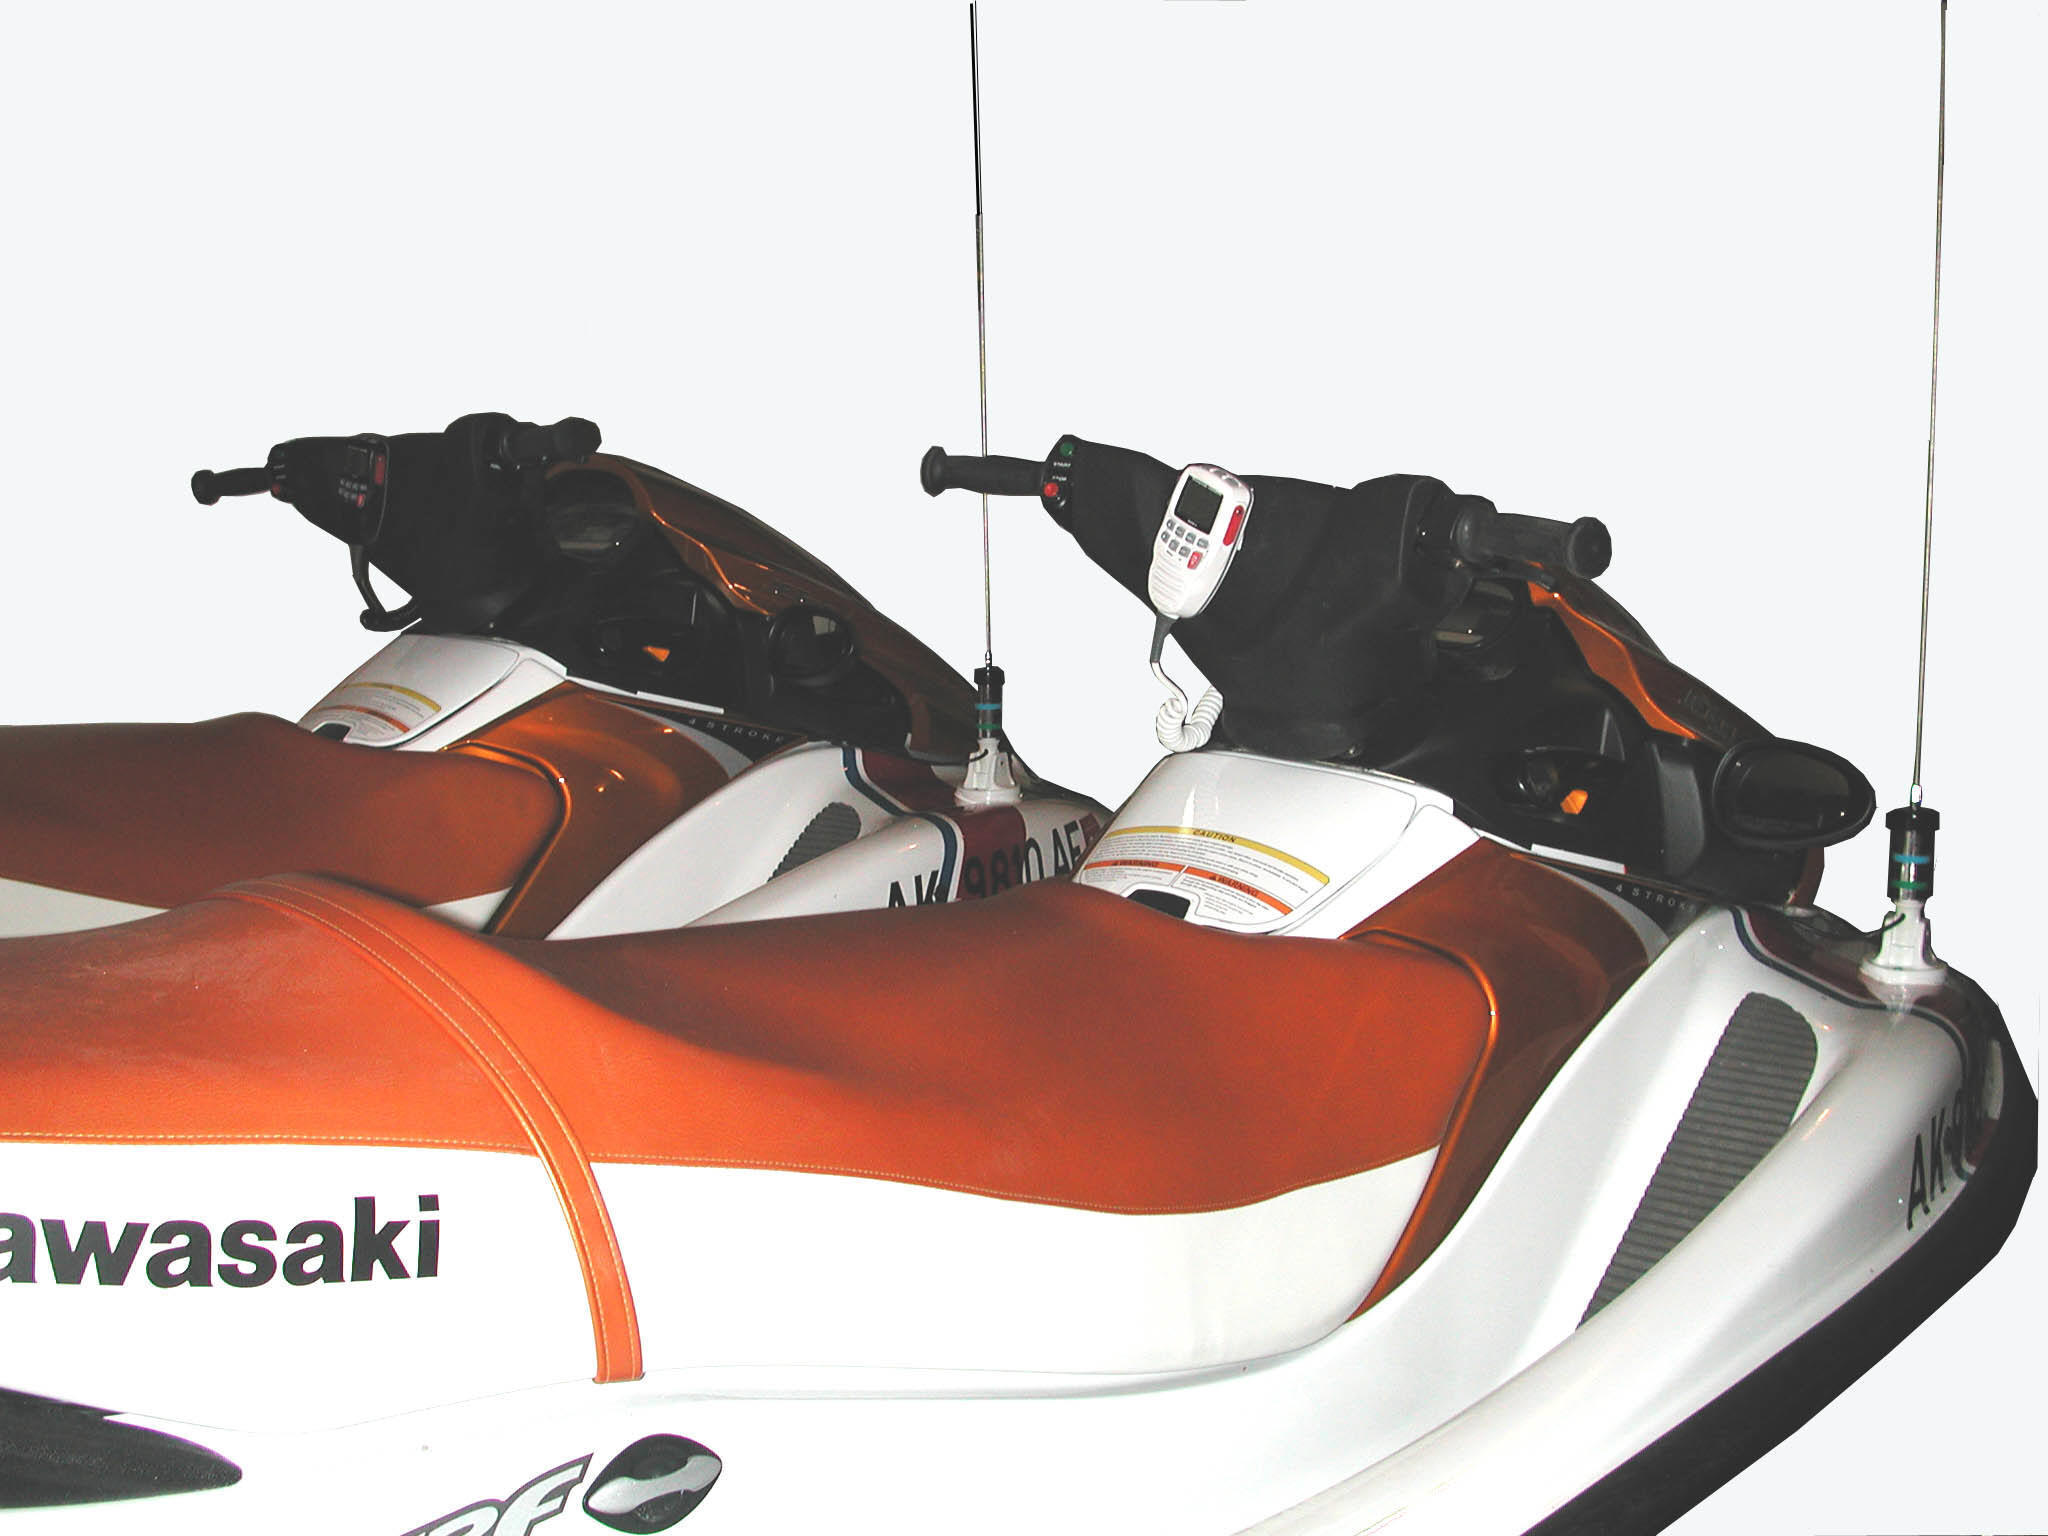 "n Lay and allows putting the covers on. I ran the antenna lead under the starboard mirror bracket and then through the hull at the mirror attach bolts and bedded it with 3M 5200 stainless bolts. I built stainless sheet metal backing plates. I ran the cable from the radio to the handset up through the balance tube that runs from the starboard side of the gas tank up to the handlebars so I didn’t have to drill any more holes in the hull than necessary.
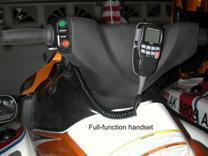 We placed the handset in the middle of the handlebars as the radio speakers are in the handset and can be heard in this position. The handset unplugs, can be secured, and the plug has a cover. The handset bracket is screwed to a 2”X2” piece of 3/8” hard plastic backing plate behind the handlebar cover.
I recommend paying special attention to the wiring. Use marine grade wiring and connectors, making sure that all the connectors are sealed and all wiring is secured using nylon wire ties. This way no rubbing or chafing should occur.